HOG - Huấn luyện mô hình phân loại người
OpenCV - tut 18: HOG (part 2)

Kiến thức nền tảng
- Histogram
- Sliding windows
- Convolution
- Đạo hàm ảnh (image gradient)
- HOG - Giải thuật trích xuất đặc trưng
Bài toán phân loại đối tượng (classification)
Bài toán phân loại (classification) là bài toán mà ta cần phân loại hình ảnh có đang chứa đối tượng hay không. Đặc điểm của bài toán phân loại là hình ảnh của đối tượng cần phân loại phải lớn nhất (chiếm chủ yếu) trong ảnh. Bài toán của ta có nhiều loại đối tượng thì mỗi loại đối tượng được gọi là một lớp đối tượng (class).
Bài toán phân loại đối tượng người
Ở bài viết trước, ta đã có thể trích đặc trưng hình ảnh bằng cách sử dụng phương pháp HOG. Nói cách khác, với một ảnh đầu ta đã có thể "encode" ảnh đó thành một vector 3780 chiều! Như vậy, với bài toán phân loại người, là một bài toán phân loại nhị phân: chỉ có 2 lớp, lớp người (ta cần tìm) và lớp background (không có người).
Để giải quyết bài toán phân loại đối tượng này, ta cần một mô hình học máy (machine learning) tiếp nhận dữ liệu là các vector đặc trưng đã trích xuất và nhãn tương ứng của đặc trưng đó -> đây chính là dữ liệu huấn luyện cho mô hình. Dữ liệu huấn luyện là tri thức cho mô hình để nó có thể đưa ra những dự đoán. Nếu vậy, bạn có đang thắc mắc rằng tính chất của dữ liệu huấn luyện mà ta sẽ dùng để học như thế nào là tốt?! Đây là một vài gợi ý của Minh:
- Dữ liệu càng đa dạng càng tốt
- Dữ liệu càng nhiều càng tốt
- Phân phối của dữ liệu huấn luyện train phải cùng phân phối với dữ liệu test
Giới thiệu văn chương lai láng vậy cũng được rồi, mình bắt tay vào huấn luyện một mô hình phân loại đối tượng người nhé :)
Tập dữ liệu
Trong bài báo HOG, các tác giả đã sử dụng tập dữ liệu huấn luyện là INRIA Person Dataset. Thông tin tập dữ liệu:
- Tên dataset: INRIA Person Dataset
- Trang chủ dataset: http://pascal.inrialpes.fr/data/human/ (cập nhật 23/04/2020: link không vào được)
- Link FTP download trực tiếp: ftp://ftp.inrialpes.fr/pub/lear/douze/data/INRIAPerson.tar
- Link GDrive dự phòng (lưu trữ cá nhân của minhng.info): https://drive.google.com/open?id=1HYR2wfXRkj9Jg979c9CwFeDVL574hR9U
Sau khi tải về ta sẽ có file INRIAPerson.tar (970MB) và giải nén nó thành thư mục INRIAPerson. Cấu trúc tổ chức thư mục của INRIA như sau:
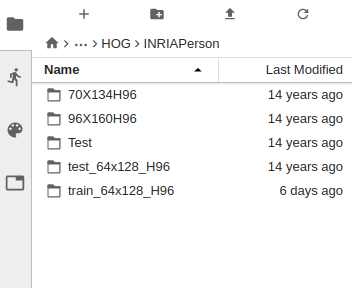
Các file groundtruth nằm tại:
- Tập positive (nhãn dương - người): INRIAPerson/train_64x128_H96/pos.lst
- Tập negative (nhãn âm - background): INRIAPerson/train_64x128_H96/Train/neg.lst
Nội dung các file này sẽ chứa đường dẫn tương đối đến các file ảnh.
Sau khi download và giải nén cho nó nằm yên vị trên máy là xong rồi đó, hehee. Ta tiếp tục qua bước tiếp theo.
Huấn luyện mô hình phân loại người dùng đặc trưng HOG
Lộ trình các bước thực hiện để học tập trên tập dữ liệu phân loại ta làm như sau:
- Lần lượt duyệt các ảnh người trong tập positive theo file groundtruth
- Đọc ảnh positive, do ảnh này đã crop sẵn chỉ chứa đối tượng người nên ta tiến hành rút trích đặc trưng HOG luôn
- Trích đặc trưng mỗi ảnh ta tiến hành lưu trữ lại vector 3780 chiều đó
- Sau khi "xử" hết tập positive ta sẽ thu thập được một ma trận có kích thước 2416 x 3780, mỗi dòng trong ma trận này là vector đặc trưng của mỗi mẫu dương. 2416 chính là số mẫu dương trong danh sách huấn luyện.
- Đọc ảnh negative, nếu bạn mở một vài ảnh mẫu âm, bạn sẽ thấy ảnh phong cảnh, không có người. Khoan vội thắc mắc, tính chất của tập mẫu âm này chính là hoàn toàn không có người. Ta sẽ crop trên ảnh này một cách ngẫu nhiên để làm mẫu âm (tức ảnh không có người). Mỗi ảnh negative ta crop ngẫu nhiên 10 mẫu âm.
- Trích đặc trưng trên các mẫu ảnh âm này và lưu trữ chúng lại
- Sau khi "xử" hết tập negative ta sẽ thu được ma trận có kích thước 12180 x 3780
- Ta sẽ tiến hành nối hai ma trận của dữ liệu negative và positive lại thành một ma trận siêu to khổng lồ có kích thước 14596 x 3780 chứa dữ liệu huấn luyện
- Tiếp theo ta sẽ tạo một vector có kích thước 14596 phần tử (bằng số mẫu huấn luyện), trong đó 12180 phần tử đầu tiên chứa giá trị 0 (đại diện cho mẫu âm) và 2416 phần tử còn lại trong vector là giá trị 1 (mẫu dương - người). Lưu ý rằng tương ứng vị trí vector chứa nhãn (label) phải khớp với vị trí của vector đặc trưng đó bên ma trận chứa vector đặc trưng.
- Đưa vector đặc trưng và nhãn vào mô hình huấn luyện SVM để học
Chém dữ quá rồi, thể nào cũng có người đang nghĩ… "nôn code ra coi", và đây… là code đây :)). Đặt file python này cùng cấp với thư mục INRIAPerson nhé. Sau đó chạy lệnh:
Cài đặt thêm dependency (OpenCV, numpy là đương nhiên phải có rồi nha, mình không list ra đây):
pip install -r requirements.txt
requirements.txt
Pillow
scikit-learn
Huấn luyện mô hình phân loại người dùng đặc trưng hình ảnh HOG:
python hog_train.py
hog_train.py
import os
import random
import cv2
import numpy as np
from numpy import linalg as LA
from PIL import Image
from sklearn import svm
import joblib # save / load model

"""
# Download INRIAPerson dataset:
$ wget ftp://ftp.inrialpes.fr/pub/lear/douze/data/INRIAPerson.tar
$ tar -xf INRIAPerson.tar
"""

TRAIN_POS_LST = 'INRIAPerson/train_64x128_H96/pos.lst'
TRAIN_POS_DIR = 'INRIAPerson/96X160H96/Train'

TRAIN_NEG_NUM_PATCHES_PER_IMAGE = 10
TRAIN_NEG_LST = 'INRIAPerson/train_64x128_H96/Train/neg.lst'
TRAIN_NEG_DIR = 'INRIAPerson/train_64x128_H96/Train'

TRAIN_NEG_PATCH_SIZE_RANGE = (0.4, 1.0)

def hog(img_gray, cell_size=8, block_size=2, bins=9):
    img = img_gray
    h, w = img.shape # 128, 64

    # gradient
    xkernel = np.array([[-1, 0, 1]])
    ykernel = np.array([[-1], [0], [1]])
    dx = cv2.filter2D(img, cv2.CV_32F, xkernel)
    dy = cv2.filter2D(img, cv2.CV_32F, ykernel)

    # histogram
    magnitude = np.sqrt(np.square(dx) + np.square(dy))
    orientation = np.arctan(np.divide(dy, dx+0.00001)) # radian
    orientation = np.degrees(orientation) # -90 -> 90
    orientation += 90 # 0 -> 180

    num_cell_x = w // cell_size # 8
    num_cell_y = h // cell_size # 16
    hist_tensor = np.zeros([num_cell_y, num_cell_x, bins]) # 16 x 8 x 9
    for cx in range(num_cell_x):
        for cy in range(num_cell_y):
            ori = orientation[cy*cell_size:cy*cell_size+cell_size, cx*cell_size:cx*cell_size+cell_size]
            mag = magnitude[cy*cell_size:cy*cell_size+cell_size, cx*cell_size:cx*cell_size+cell_size]
            # https://docs.scipy.org/doc/numpy/reference/generated/numpy.histogram.html
            hist, _ = np.histogram(ori, bins=bins, range=(0, 180), weights=mag) # 1-D vector, 9 elements
            hist_tensor[cy, cx, :] = hist
        pass
    pass

    # normalization
    redundant_cell = block_size-1
    feature_tensor = np.zeros([num_cell_y-redundant_cell, num_cell_x-redundant_cell, block_size*block_size*bins])
    for bx in range(num_cell_x-redundant_cell): # 7
        for by in range(num_cell_y-redundant_cell): # 15
            by_from = by
            by_to = by+block_size
            bx_from = bx
            bx_to = bx+block_size
            v = hist_tensor[by_from:by_to, bx_from:bx_to, :].flatten() # to 1-D array (vector)
            feature_tensor[by, bx, :] = v / LA.norm(v, 2)
            # avoid NaN:
            if np.isnan(feature_tensor[by, bx, :]).any(): # avoid NaN (zero division)
                feature_tensor[by, bx, :] = v

    return feature_tensor.flatten() # 3780 features

def read_image_with_pillow(img_path, is_gray=True):
    pil_im = Image.open(img_path).convert('RGB')
    img = np.array(pil_im)
    img = img[:, :, ::-1].copy()  # Convert RGB to BGR
    img = cv2.cvtColor(img, cv2.COLOR_BGR2GRAY)
    return img

def train(train_pos_lst, train_pos_dir, train_neg_lst, train_neg_dir, train_neg_num_patches_per_image, train_neg_patch_size_range):
    assert os.path.isfile(train_pos_lst) and os.path.isfile(train_neg_lst)

    # ---------- READ & EXTRACT POSITIVE SAMPLES (PERSON) ----------
    with open(train_pos_lst) as f:
        pos_lines = f.readlines()

    positive_features = []
    pos_lines = [os.path.join(train_pos_dir, '/'.join(pl.split('/')[1:])).strip() for pl in pos_lines]
    for idx, pline in enumerate(pos_lines):
        img_path = pline
        if not os.path.isfile(img_path):
            print('[pos] Skipped %s' % img_path)
            continue
        img = read_image_with_pillow(img_path, is_gray=True)
        img = cv2.resize(src=img, dsize=(64, 128))
        f = hog(img)
        positive_features.append(f)
        print('[pos][%d/%d] Done HOG feature extraction @ %s' % (idx+1, len(pos_lines), img_path))

    positive_features = np.array(positive_features)
    # ---------- END - READ & EXTRACT POSITIVE SAMPLES (PERSON) ----------

    # ---------- READ & EXTRACT NEGATIVE SAMPLES (BACKGROUND) ----------
    with open(train_neg_lst) as f:
        neg_lines = f.readlines()

    negative_features = []
    neg_lines = [os.path.join(train_neg_dir, '/'.join(pl.split('/')[1:])).strip() for pl in neg_lines]
    for idx, nline in enumerate(neg_lines):
        img_path = nline
        if not os.path.isfile(img_path):
            print('[neg] Skipped %s' % img_path)
            continue
        img = read_image_with_pillow(img_path, is_gray=True)
        img_h, img_w = img.shape
        img_min_size = min(img_h, img_w)

        # random crop
        negative_patches = []
        for num_neg_idx in range(train_neg_num_patches_per_image):
            random_patch_size = random.uniform(train_neg_patch_size_range[0], train_neg_patch_size_range[1])
            random_patch_height = int(random_patch_size*img_min_size)
            random_patch_width = int(random_patch_height * random.uniform(0.3, 0.7))
            random_position_x = random.randint(0, img_w-random_patch_width)
            random_position_y = random.randint(0, img_h-random_patch_height)
            # crop image -> image patch
            npatch = img[random_position_y:random_position_y+random_patch_height, random_position_x:random_position_x+random_patch_width]
#             cv2.imwrite('npatch-%d.jpg' % num_neg_idx, npatch)
            negative_patches.append(npatch)

        for npatch in negative_patches:
            img = cv2.resize(src=npatch, dsize=(64, 128))
            f = hog(img)
            negative_features.append(f)
        print('[neg][%d/%d] Done HOG feature extraction @ %s' % (idx+1, len(pos_lines), img_path))

    negative_features = np.array(negative_features)
    # ---------- END - READ & EXTRACT NEGATIVE SAMPLES (BACKGROUND) ----------

    print('Our positive features matrix: ', positive_features.shape) # (2416, 3780)
    print('Our negative features matrix: ', negative_features.shape) # (12180, 3780)

    x = np.concatenate((negative_features, positive_features), axis=0) # (14596, 3730)
    y = np.array([0]*negative_features.shape[0] + [1]*positive_features.shape[0])

    print('X: ', x.shape) # (14596, 3780)
    print('Y: ', y.shape) # (14596,)
    print('Start training model with X & Y samples...')

    # ---------- TRAIN SVM ----------

    # https://scikit-learn.org/stable/modules/svm.html
    # https://scikit-learn.org/stable/modules/generated/sklearn.svm.SVC.html
    model = svm.SVC(C=0.01, kernel='rbf', probability=True)
    model = model.fit(x, y)

    print('Done training model!')
    return model

def main():
    svm_model = train(train_pos_lst=TRAIN_POS_LST,
                      train_pos_dir=TRAIN_POS_DIR,
                      train_neg_lst=TRAIN_NEG_LST,
                      train_neg_dir=TRAIN_NEG_DIR,
                      train_neg_num_patches_per_image=TRAIN_NEG_NUM_PATCHES_PER_IMAGE,
                      train_neg_patch_size_range=TRAIN_NEG_PATCH_SIZE_RANGE)

    # save model
    # https://scikit-learn.org/stable/modules/model_persistence.html
    out_model_name = 'model_hog_person.joblib'
    joblib.dump(svm_model, out_model_name)
    print('=> Trained model is saved @ %s' % out_model_name)
    pass

if __name__ == "__main__":
#     print('Start running HOG on image @ %s' % IMG)
    main()
    print('* Follow me @ ' + "\x1b[1;%dm" % (34) + ' https://www.facebook.com/minhng.info/' + "\x1b[0m")
    print('* Join GVGroup for discussion @ ' + "\x1b[1;%dm" % (34) + 'https://www.facebook.com/groups/ip.gvgroup/' + "\x1b[0m")
    print('* Thank you ^^~')
Sau khi đọc xong code thì phải thốt lên rằng… "móa, sao code dài thế" :)). Cái đó đương nhiên rồi nha, M đã cố gắng viết ngắn gọn nhất có thể rồi. Sau đây là note giải thích một số điểm khó hiểu trong code train trên.
def read_image_with_pillow(img_path, is_gray=True):
    pil_im = Image.open(img_path).convert('RGB')
    img = np.array(pil_im)
    img = img[:, :, ::-1].copy()  # Convert RGB to BGR
    img = cv2.cvtColor(img, cv2.COLOR_BGR2GRAY)
    return img
=> Do ảnh trong tập dữ liệu này đã quá lâu đời (2005 - cách đây 14 năm!) và mình đã thử OpenCV không đọc được ảnh png của nó. Do đó mình phải dùng PILLOW để đọc và convert sang cấu trúc Numpy để tiếp tục xử lý bằng OpenCV -> làm xử lý ảnh là vậy, bạn phải "thông" từ OpenCV, Numpy cho đến tận Pillow xa xôi luôn :))~
negative_patches = []
for num_neg_idx in range(train_neg_num_patches_per_image):
    random_patch_size = random.uniform(train_neg_patch_size_range[0], train_neg_patch_size_range[1])
    random_patch_height = int(random_patch_size*img_min_size)
    random_patch_width = int(random_patch_height * random.uniform(0.3, 0.7))
    random_position_x = random.randint(0, img_w-random_patch_width)
    random_position_y = random.randint(0, img_h-random_patch_height)
    # crop image -> image patch
    npatch = img[random_position_y:random_position_y+random_patch_height, random_position_x:random_position_x+random_patch_width]
    negative_patches.append(npatch)
=> Giải thuật random crop M tự viết, ý tưởng như sau: random ngẫu nhiên kích thước patch ảnh, chọn vị trí (x, y) ngẫu nhiên trên ảnh sau đó crop ra và lưu vào danh sách. Tí nữa duyệt trích đặc trưng HOG sau.
x = np.concatenate((negative_features, positive_features), axis=0) # (14596, 3730)
y = np.array([0]*negative_features.shape[0] + [1]*positive_features.shape[0])
model = svm.SVC(C=0.01, kernel='rbf', probability=True) # <= probability=True: kết quả dự đoán sẽ cho ta các giá trị độ tin cậy (xác suất)
model = model.fit(x, y)
=> Ráp thành ma trận siêu to khổng lồ và nhãn tương ứng của nó. Train mô hình học máy SVM dùng thư viện scikit-learn.
Tới quá trình huấn luyện SVM nó sẽ mất thời gian hơi lâu nheeeeeeeee. Hãy kiên nhẫn chờ cho đến khi file mô hình được lưu xuống: model_hog_person.joblib. Có được mô hình này là bạn đã tu thành chính quả rồi đó :D.
Dự đoán phân loại ảnh người
Sau khi có mô hình đã huấn luyện (pretrained model), mình chỉ việc load trọng số của SVM lên và dùng nó dự đoán thôi. Bạn download file woman.jpg (bên dưới) về và để cùng cấp với file hog_test.py nha. Sau đó chạy lệnh python hog_test.py hoặc lệnh python hog_test.py <đường dẫn ảnh> để nó xử lý ảnh ở đường dẫn chỉ định.
Nếu bạn không đủ kiên nhẫn để chờ đợi mô hình được huấn luyện, hãy tải mô hình của M về ở link sau đây: model_hog_person_190901 (139MB)
woman.jpg

hog_test.py
import os
import sys
import time
import operator
import cv2
import numpy as np
from numpy import linalg as LA
from PIL import Image
from sklearn import svm
import joblib # save / load model

"""
# Download INRIAPerson dataset:
$ wget ftp://ftp.inrialpes.fr/pub/lear/douze/data/INRIAPerson.tar
$ tar -xf INRIAPerson.tar
"""

MODEL_PATH = 'model_hog_person.joblib'
IMG_PATH = 'woman.jpg'

def hog(img_gray, cell_size=8, block_size=2, bins=9):
    img = img_gray
    h, w = img.shape # 128, 64

    # gradient
    xkernel = np.array([[-1, 0, 1]])
    ykernel = np.array([[-1], [0], [1]])
    dx = cv2.filter2D(img, cv2.CV_32F, xkernel)
    dy = cv2.filter2D(img, cv2.CV_32F, ykernel)

    # histogram
    magnitude = np.sqrt(np.square(dx) + np.square(dy))
    orientation = np.arctan(np.divide(dy, dx+0.00001)) # radian
    orientation = np.degrees(orientation) # -90 -> 90
    orientation += 90 # 0 -> 180

    num_cell_x = w // cell_size # 8
    num_cell_y = h // cell_size # 16
    hist_tensor = np.zeros([num_cell_y, num_cell_x, bins]) # 16 x 8 x 9
    for cx in range(num_cell_x):
        for cy in range(num_cell_y):
            ori = orientation[cy*cell_size:cy*cell_size+cell_size, cx*cell_size:cx*cell_size+cell_size]
            mag = magnitude[cy*cell_size:cy*cell_size+cell_size, cx*cell_size:cx*cell_size+cell_size]
            # https://docs.scipy.org/doc/numpy/reference/generated/numpy.histogram.html
            hist, _ = np.histogram(ori, bins=bins, range=(0, 180), weights=mag) # 1-D vector, 9 elements
            hist_tensor[cy, cx, :] = hist
        pass
    pass

    # normalization
    redundant_cell = block_size-1
    feature_tensor = np.zeros([num_cell_y-redundant_cell, num_cell_x-redundant_cell, block_size*block_size*bins])
    for bx in range(num_cell_x-redundant_cell): # 7
        for by in range(num_cell_y-redundant_cell): # 15
            by_from = by
            by_to = by+block_size
            bx_from = bx
            bx_to = bx+block_size
            v = hist_tensor[by_from:by_to, bx_from:bx_to, :].flatten() # to 1-D array (vector)
            feature_tensor[by, bx, :] = v / LA.norm(v, 2)
            # avoid NaN:
            if np.isnan(feature_tensor[by, bx, :]).any(): # avoid NaN (zero division)
                feature_tensor[by, bx, :] = v

    return feature_tensor.flatten() # 3780 features

def read_image_with_pillow(img_path, is_gray=True):
    pil_im = Image.open(img_path).convert('RGB')
    img = np.array(pil_im)
    img = img[:, :, ::-1].copy()  # Convert RGB to BGR
    img = cv2.cvtColor(img, cv2.COLOR_BGR2GRAY)
    return img

def main(model_path, img_path):
    # load pretrained model
    # https://scikit-learn.org/stable/modules/model_persistence.html
    svm_model = joblib.load(model_path)

    time_start = time.time()

    # read image & extract HOG feature
    img = read_image_with_pillow(img_path, is_gray=True)
    img = cv2.resize(src=img, dsize=(64, 128))

    f = hog(img)

    # predict
    pred_y1 = svm_model.predict(np.array([f]))
    pred_y = svm_model.predict_proba(np.array([f]))

    class_probs = pred_y[0]
    max_class, max_prob = max(enumerate(class_probs), key=operator.itemgetter(1))

    class_str = 'PERSON' if max_class == 1 else 'BACKGROUND'
    prob_str = '%d' % int(max_prob*100)

    time_end = time.time()

    print('------------------------------------------------------------------------')
    print('%s => Detected %s @ confidence: %s%% (elapsed time: %ss)' % (os.path.basename(img_path), class_str, prob_str, '%.2f'%(time_end-time_start)))
    print('------------------------------------------------------------------------')
    pass

if __name__ == "__main__":
    image_path = IMG_PATH if len(sys.argv) == 1 else sys.argv[1]
    main(MODEL_PATH, image_path)
    print('* Follow me @ ' + "\x1b[1;%dm" % (34) + ' https://www.facebook.com/minhng.info/' + "\x1b[0m")
    print('* Join GVGroup for discussion @ ' + "\x1b[1;%dm" % (34) + 'https://www.facebook.com/groups/ip.gvgroup/' + "\x1b[0m")
    print('* Thank you ^^~')
Chạy lệnh test:
root@e7eba89aeeaf:/workspace/OPENCV/HOG# python hog_test.py woman.jpg
------------------------------------------------------------------------
woman.jpg => Detected PERSON @ confidence: 99% (elapsed time: 0.12s)
------------------------------------------------------------------------
* Follow me @  https://www.facebook.com/minhng.info/
* Join GVGroup for discussion @ https://www.facebook.com/groups/ip.gvgroup/
* Thank you ^^~
Ố là la, ngạc nhiên chưa. Mô hình nó phân loại ảnh woman.jpg là có NGƯỜI (99%) :">. Như vậy, ta cơ bản đã có thể huấn luyện được một mô hình machine learning cho tác vụ phân loại đối tượng. Từ đây, ta có thể kết hợp nó với kỹ thuật sliding window để giải quyết bài toán phát hiện đối tượng => chỉ ra box đối tượng là ở đâu trên ảnh! Tu-bi-con-tờ-niu.
Cảm ơn bạn đã theo dõi bài viết. Hãy kết nối với tớ nhé!
- Minh: https://www.facebook.com/minhng.info
- Khám phá xử lý ảnh - GVGroup: https://www.facebook.com/groups/ip.gvgroup
Khám phá xử lý ảnh - GVGroup
Danh sách bài viết series OpenCV:
- Hashtag #OpenCV
- Tut 1: Xử lý ảnh - OpenCV đọc ghi hình ảnh (code Python và C++)
- Tut 1.1: Xử lý ảnh - Cấu trúc dữ liệu ảnh trong OpenCV. Pixel là gì?
- Tut 1.2: Xử lý ảnh - Chuyển đổi ảnh OpenCV sang Pillow và ngược lại
- Tut 1.3: Vì sao gốc tọa độ ảnh ở góc trên bên trái?
- Tut 2: Xử lý ảnh - OpenCV resize, crop và padding hình ảnh (code Python và C++)
- Tut 3: Xử lý ảnh - OpenCV biến đổi mức sáng hình ảnh (code Python)
- Tut 4: Xử lý ảnh - OpenCV vùng quan tâm (ROI) là gì? (code Python)
- Tut 4.1: Xử lý ảnh - OpenCV: vẽ văn bản, đường thẳng, mũi tên, hình chữ nhật, hình tròn, ellipse, đa giác
- Tut 4.2: Xử lý ảnh - Pha trộn ảnh trong OpenCV (blending)
- Tut 5: Xử lý ảnh - OpenCV ảnh nhị phân
- Tut 6: Xử lý ảnh - OpenCV cân bằng sáng (histogram equalization)
- Tut 7: Xử lý ảnh - OpenCV kỹ thuật cửa sổ trượt (sliding window)
- Tut 8: Xử lý ảnh - Convolution là gì?
- Tut 9: Xử lý ảnh - Làm mờ ảnh (blur)
- Tut 10: Xử lý ảnh - Gradient của ảnh là gì?
- Tut 11: Xử lý ảnh - Phát hiện cạnh Canny (Canny Edge Detection)
- Tut 12: Xử lý ảnh - Phát hiện đường thẳng bằng Hough Transform (Hough Line)
- Tut 13: Xử lý ảnh - Hiện thực phát hiện đoạn thẳng dùng Hough Transform (Hough Line)
- Tut 14: Xử lý ảnh - Giải thuật phân vùng Region Growing trên ảnh màu
- Tut 15: Xử lý ảnh - Giải thuật Background Subtraction trên ảnh màu
- Tut 16: Xử lý ảnh - Frame Subtraction để phát hiện chuyển động trong video
- Tut 17: Xử lý ảnh - HOG - Histograms of Oriented Gradients
- Tut 18: Xử lý ảnh - HOG - Huấn luyện mô hình phân loại người
- Tut 19: Xử lý ảnh - HOG - Phát hiện người
- Tut 20: Xử lý ảnh - Tổng hợp kinh nghiệm xử lý ảnh (End)
- Tut 21: Xử lý ảnh - Hiện thực trích đặc trưng Local Binary Patterns (LBP)
- Tut 22: Xử lý ảnh - Trích đặc trưng Gabor filters
- Tut 23: Xử lý ảnh - Trích đặc trưng SIFT